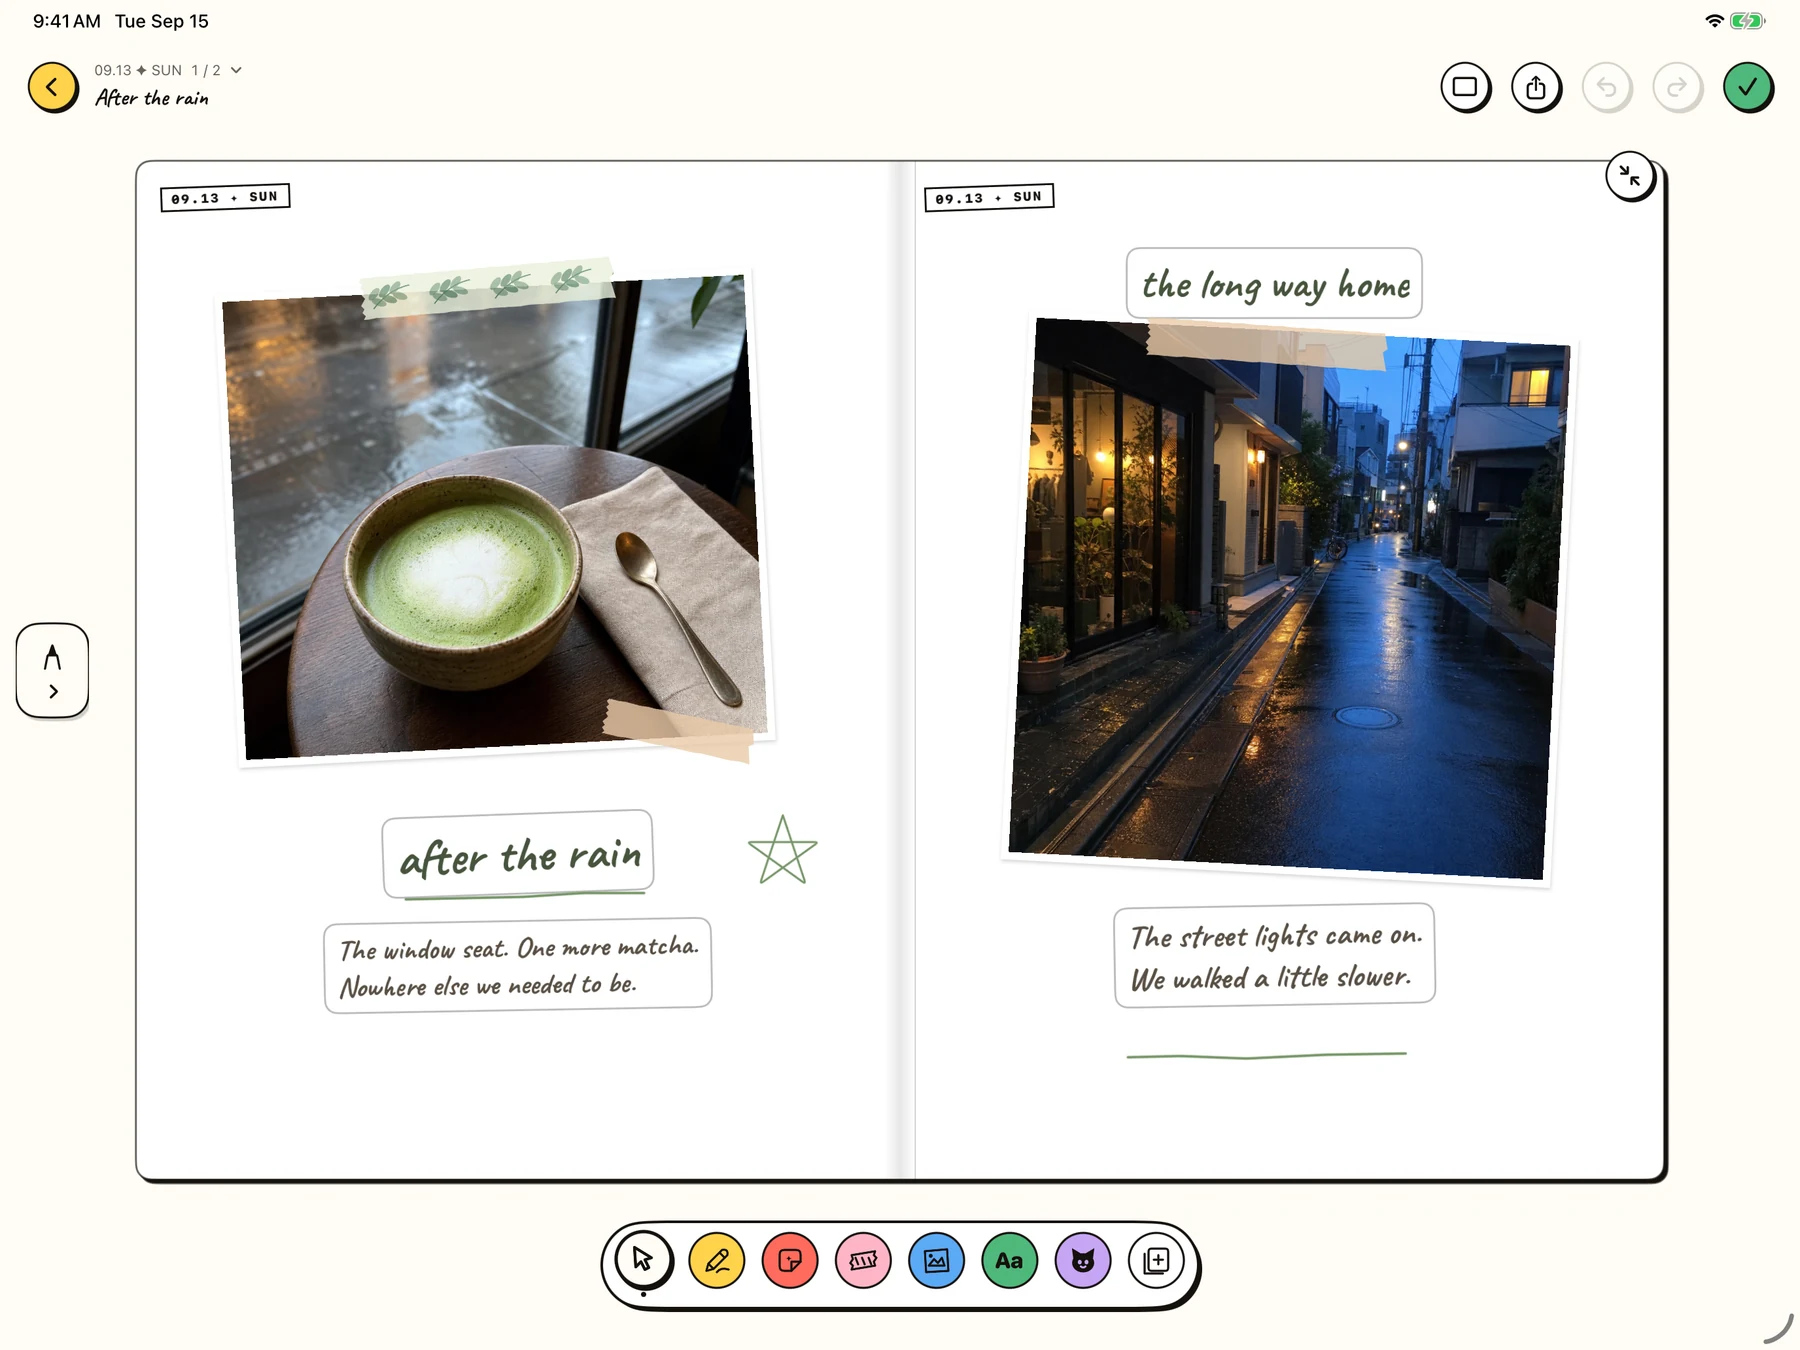
How to make a calm, expressive sticker journal page on iPad
A larger canvas should create better decisions—not simply make room for more objects.

The short version
- Decide the page's one-sentence story before arranging elements.
- Build hierarchy from large to small and protect white space early.
- Use Apple Pencil for precision, then zoom out to judge the whole page.
- Finish when the memory reads clearly, not when every gap is decorated.
Prepare the story before you prepare the canvas
Choose one moment and complete this sentence: “This page is about…” Keep the answer concrete. “This page is about the rainy afternoon when we stopped rushing” gives you more direction than “Tuesday café.”
Select a small material set before opening the editor: one main photo, perhaps one supporting photo, one personal sticker, and a short note. Too many options make a large screen feel less spacious.
If you are following along with a tutorial recording, use demo photos without private faces, addresses, notifications, or identifying details. Prepare them in a dedicated album so the recording never exposes the rest of the library.
- One-sentence story
- One dominant photo
- Zero or one supporting photo
- One personal sticker and up to two quiet accents
- A title plus two to five sentences
Step 1: block the page from large to small
Place the dominant photo first. Its position creates the gravity for everything else. Then add the title in a location that makes the reading order obvious. Do not fine-tune either yet.
Add the supporting piece only after the first two elements work together. A second photo, sticker, or text block should answer or balance the main element. If it only occupies space, leave it out.
At this stage, work zoomed out. You are setting relationships, not polishing edges.
Create a new iPad entry, add the dominant photo and title, then place one supporting element while staying at overview scale.
Step 2: use Apple Pencil for precision, not endless adjustment
Once the hierarchy works, zoom in and use Apple Pencil to select and nudge smaller elements. The Pencil is especially helpful when a fingertip would cover the edge or handle you are aligning.
Make one kind of adjustment at a time. First position, then scale, then rotation. Mixing all three continuously makes it difficult to know whether the page is improving.
After every two or three precise edits, zoom back out. A technically aligned sticker can still be visually too loud. Overview is where you evaluate weight.
Position
Move the element until its relationship to the title, photo, or margin feels intentional.
Scale
Reduce it until it supports the main element rather than competing with it.
Rotation
Add only enough tilt to create energy while keeping the shape readable.
Overview
Zoom out and look away for a moment. Notice what your eye finds first when you return.
Select two small elements, adjust position/scale/rotation in separate passes, then zoom out to compare visual weight.
Step 3: protect white space as an active material
White space is where the page slows down. It separates the moment from the controls and notifications surrounding it in everyday digital life. On a sticker page, it also makes each personal object feel chosen.
Identify one quiet zone and protect it. This may be a broad margin, an open corner, or space around the writing. If you feel an urge to fill it, ask what new information the added element would carry.
A page can feel unfinished because the hierarchy is weak, not because it is empty. Try enlarging the main photo or strengthening the title before adding another sticker.

Step 4: write the invisible half of the memory
Use the title to make the page findable in your own mind. Choose a concrete phrase: a place, object, weather detail, or line of dialogue. Then write what the photographs leave out.
On a visually rich page, text benefits from brevity and specificity. Two precise sentences can anchor many images. Avoid summarizing the full day unless the page truly needs it.
Read the words once without looking at the visuals, then look at the visuals without reading. Finally, experience them together. If each layer contributes different information, the page has depth. If both repeat the same fact, revise one.
Write a recognizable title and a three-sentence reflection that adds context rather than describing the photo.
Step 5: use a finishing checklist that favors meaning
A large canvas invites one more adjustment forever. Use a stable end condition. The page is ready when the reading order is clear, every visible element carries meaning or rhythm, the text is comfortable to read, and one quiet area remains.
Then save. Do not wait for the page to look like someone else’s template. A journal develops a visual language through many completed pages. The slight mismatch, recurring sticker, or unusual spacing may become the part that makes the set yours.
- Can I tell what the page is about in five seconds?
- Does the main photo or phrase lead clearly?
- Does every sticker have a reason to remain?
- Does the writing add invisible context?
- Is there at least one place for the eye to rest?